
I’ve finally gotten around to fabricating the first version of my CAN-based keypad board. This unit was designed to act as an input/display device for the security-esque features of my automation-integration system.
This is revision 1a of the board, so it’s really a prototype version. The board provides the following resources:
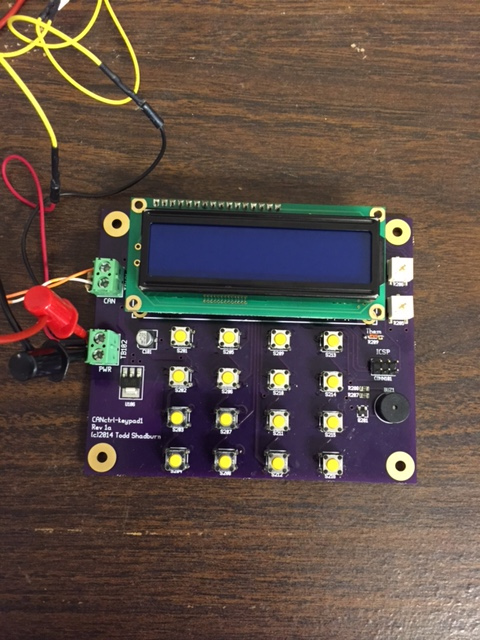
- a 16 key input pad in a 4×4 matrix
- a 16×2 LCD for displaying pertinent data
- one 10k NTC thermistor for collecting ambient temperature measurement
- a CAN interface using the MCP2510/MCP2551 ICs.
When I started the development of the first CAN-based board (cansecio1), I knew that I would need to design multiple boards for the system. So I took a module approach when creating the schematics. The MCU and CAN controller components were placed in one schematic file. This schematic includes the ICs, power regulation, clocks and filter components and the power and CAN connectors. This schematic forms the base for all of my CAN bus boards. The base schematic also provides named nets for all of the unused MCU pins as well as shared MCU pins (RESET, SPI bus, etc). The board-specific design/components are added to a separate schematic file. The components are “connected” to the MCU using the named nets from the base schematic. A project is created using both of the schematics, from which a complete net file can be generated, and the board layout is then completed in PCB.
Once the layout is finished, it’s off to the fab house. I’ve been using OSH Park when I just need a couple of prototype boards and the solder stencils from OSH Stencils have been great.
The firmware for this board begins with my standard APIs for the LCD and CAN interfaces. Because this board used my existing CAN hardware/software implementations, there was no debugging needed to get the board on the CAN network. It was truly just a matter of assigning the board a node ID (in software) and connecting it to the network. To those components, I’ve added an ADC API for measuring the thermistor temperature. The API is generic and supports all of the AVR’s ADC interface pins, but this board only uses the ADC6 pin. The API only provides raw ADC output values, it’s up to the application to perform useful calculations/conversions on the raw data. This API will also be used for future I/O boards.
The keypad controller was also given an interrupt-driven keyboard scanning routine and a FIFO implementation for the captured key presses.
The next challenge was to design a protocol to allow the keypad(s) and I/O controllers on the network to not only communicate with each other, but to be able to coordinate and maintain state-consistency with each other. From a security controller aspect, this means negotiating state transitions such as ready->armed, armed->disturbed, alert, armed->ready, and so on. I’ve decided on using a simple state machine driven architecture to accomplish this. Each controller will use a state machine for managing local functionality; keypad/display, I/O ports, interfaces, etc. In turn, the controllers will also be running a state machine for managing network communications.
I’ve implemented a basic CAN network state machine to be used as a base for the upper-level protocols I’ll need. Using state machines provides a couple of excellent benefits. First, it provides a good code abstraction layer, which is important given the modular nature of the system’s architecture. Second, and maybe more importantly, each state machine is implemented with a completely non-blocking design. This is extremely important for microcontroller-based systems, due to their limited resources.
The next item on my ToDo list is to being work on the upper-level network protocol implementation. The security protocol component will be the first to be implemented, since the boards I’ve built thus far are geared around that area. Because ambient temperature data is available at the keypads, integration with the HVAC system would also be a quick and easy code addition.
Until next time…